Using Scheduled Reports
One of the quickest ways to send off reports once a sale is complete is to use the Scheduled Reports option for Vendors, Purchasers and Agents. As of version 5.6, it is also possible to send select third party reports. With the click on just a couple of parameters all like reports will be sent to their various destinations in one go.
In Livestock
If you are already in a sale, and need to quickly add details for one contact:
Step 1. Right-click on the contact:
Either the Vendor in Vendor Listing or Purchaser in Purchaser Ways.
Step 2. Select Vendor/Purchaser Control
This will take you to the following screen (in Address Book) where you can follow on from Step 2 below in Address Book.

If this information should be used in the future, remember to click on Copy from Vendor Control to add the detail to the record for future use.
In Address Book
If you are already in a sale, use Vendor Control to arrive at Step 2 below. However, If you are updating more than one contact, it is easier to complete this for each contact in Address Book.
Step 1. Confirm the settings in the contact record.
i. Ensure that the contact in the address book as been labelled appropriately as a Vendor and/or Purchaser.

One or both of these boxes needs to be ticked otherwise you will not be able to add report options.
To add a contact as an agent, click on the Agent field to the right hands side and add a code
ii. Ensure that the correct email address has been entered into the Primary Email address field for the contact.
If more than one addressee needs to be sent the reports, add the other email address after a semi-colon ";" in the Primary Email field
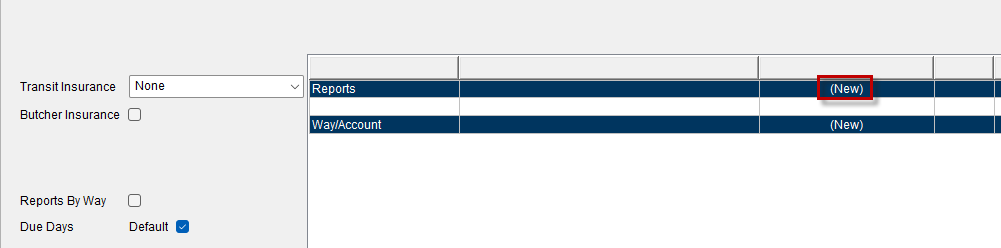
iii. Verify that the corresponding fields are populated in order to have the reports enabled. You should not see "New" for the contact type you are updating.
Step 2. Enable Scheduled Reports
Click on Agent/Purchaser/Vendor field, to open this section and select the reports.
Step 3. Add the email address to the field
Click on the email found on the right-hand-side to populate the record.

If you cannot access the below report screen, then your contact has not been setup as a vendor/purchaser or agent.
Step 4. Select the reports that should be sent for which type of sale.
Multiple reports and sale types can be chosen. Not everyone needs to receive the same reports so it is possible to customise which reports go to which email addresses.
Be aware that for each row you pick, an attachment is being created.
If choosing to send NVD information, this will generate a separate email as the attachment tends to be very large.
Step 5. Save your settings

If there is more than one email address for the record, repeat this step as many times as needed.
Sending the Reports:
Step 1. Select Transmit and click on the schedule report type you want to send.
Step 2. Select Confirm before Generating the Report.
So you are able to ensure the right emails are being sent to the right places.
If you have multiple Vendors, check the box on the right to send the same report to as many as required.
Selected details will be coloured green.
If not selecting scheduled reports, only one report can be sent at a time, unless you physically attach more.
For a single email/report
Select Transmit/Email from Print Queue, the type of Report and the client.
Step 3. Generate the Report/s.
The email window will come up. It is possible to attach other detail here manually if you wish.
Step 4: View Emails in Postman.
Click on View in Bulk if it does not auto-populate.
Step 5: Confirm Bulk Emails should be sent.
Check transmitted emails have the correct reports and are being sent to the correct addresses.
Once you are happy that everyone is receiving what they should be, click on Confirm to send.
If there are any issues, you can right-click on the email and remove.
Step 6. Click on Confirm All.
The activity report should come up to verify the status.

Or click on Activity to view.
Related Articles
Overview of Livestock Reports
Stages in Livestock Reporting Overview of Livestock Reports Preparing Emails for Distribution Generating Livestock Reports (View/Send/Print) Introduction This guide equips you with the knowledge to navigate Stockyard's livestock reporting system ...Using a Stockyard Remote System
It is possible to attend sales off-site/out of internet coverage using Stockyard to record the sale and print out reports. This requires a special setup and separate installation. Once the Remote System is installed on the laptop, printers and other ...3rd Party Clients in Stockyard
Introduction In Stockyard release 5.6.0, we introduced 3rd Party clients, a feature that allows you to include them in Livestock Sales under Scheduled 3rd Party Reports. This function enables automated distribution of sale-specific reports to ...Management Reports - Weigh Time Analysis
Use the weigh time analysis report to view and monitor the performance of lots being weighed. The weigh time analysis report shows how long it took for the average lot to be weighed. You can control how many head per lot to determine the differences ...Weighing Using the Lot Interface
CALIBRATION OF SCALES Before a sale starts, ensure you have calibrated the scales so you can verify that the weights taken are accurate (from the Scale Indicator to the PC) : Roll on your approved weight (e.g. 50kgs of weights) Ensure all gates to ...