Overview of Livestock Reports

Stages in Livestock Reporting
- Overview of Livestock Reports
- Generating and Previewing Reports
- Understanding Scheduled Reports (Bulk Email)
Introduction
This guide equips you with the knowledge to navigate Stockyard's livestock reporting system effectively. We'll start by guiding you through accessing the Reports screen and its intuitive layout. Learn how to sort reports by categories like Purchaser, Vendor, Agent, and more for quick access to the information you need.
Selecting a specific report is straightforward, and we'll explore the options available for both Saleyard and Agency users. The guide will then delve into generating reports, covering methods like viewing on screen, emailing them, and printing. Additionally, we'll explain the various options that allow you to customize your report output.
Accessing the Reports Screen

Each Sale will contain a reports screen
You can find the Reports screen in Livestock --> Open/Create a Sale

If you do not see this option in a Sale, it has been restricted by your user profile in Stockyard
Filtering Reports by Category
Radio Buttons:
An easy way to navigate through the reports
- All -- Lists all Reports available to the user
- Purchaser -- Lists all the relevant Purchaser Reports
- Vendor -- Lists all the relevant Vendor Reports
- Agent -- Lists all the relevant Agent Reports
- Contractor -- Lists all the relevant Contractor Reports
- General -- Lists the Reports to give an overview of the Sale
Selecting a Report

To select a report, left-click one of the reports from the list
Once a report has been selected (as seen in the image below), there can be many different scenarios:
For a Saleyard --
- Some reports will enable the Agent field:
This allows you to select the Agent for which you want to run the report for, it will sort the data by the Agent only or view All Data / All Agents
For a Saleyard & Agency --

Some reports will just be able to be run without selecting an Agent, Purchaser or Vendor.
- Some reports will enable the Vendor field:
This field can be sorted by Agent selection or by a report -- Sorting by Agent will automatically sort the Vendor list by Agent - Some reports will enable the Purchaser field:
This field can be sorted by Agent selection or by a report -- Sorting by Agent will automatically sort the Purchaser list by Agent
Generating and Previewing Reports
Print Queue dropdown
These are the default options to choose from:
Screen - This is the default view, where the report runs to screen
Export (csv) - This queue is mostly hidden and only shows on certain Reports (like Agent Vendor Summary). It is used to export the data to a CSV to be viewed / edited with.
Transmit - Sending an email to the Transmitted email address of the Vendor / Purchaser
Print - Print straight to the Default Printer
Email - Sending an email with a custom email address or one that is not selected as transmit in Address Book of the Vendor / Purchaser


This section is further explored in Generating Livestock Reports (View/Send/Print)
Extra fields, dropdowns and checkboxes
Copies
- The number of copies you want to email, print and export to PDF

Run(s)
- Saleyard function, allows you to choose the reports by runs

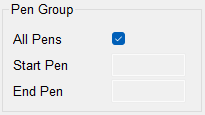
Pen Group
- Run the report from the Start Pen to End Pen (if All Pens is not ticked)

Allow Multi select
- When enabled, allows you to select more than 1 Vendor / Purchaser in the list to run with the Print Queue chosen
Way(s) (Saleyard Only)
- Saleyard only option, where you can select a Purchaser report and have the option to print all ways or individual

Scheduled Reports dropdown
- Normal: Sends the scheduled reports out straight away (Not Recommended)
- Override to print queue: Allow you to choose the best approach to sending the Scheduled Reports using a chosen Print Queue from the dropdown above (Not Recommended)
- Confirm: Sends All Scheduled Reports to Postman to await your approval in sending them out (Recommended)
Tax Invoice / Preview Invoice (Agency Only)
- Preview Invoice - This will usually display as PREVIEW TAX INVOICE on the Invoice Report
- Tax Invoice
- Normal - This will have a heading "TAX INVOICE"
- Mark as Copy - This will have a heading "TAX INVOICE (COPY)"
- Mark as Amended - This will have a heading "TAX INVOICE (AMENDED)"
- Mark as Emailed - This will have a heading "TAX INVOICE (Emailed)"
- Mark as Retained - This will have a heading "TAX INVOICE (Retained)"
- Mark as Overdue - This will have a heading "TAX INVOICE (Overdue)"
Related Articles
General Overview to Stockyard for a Saleyard
Getting Started with Stockyard Stockyard is a powerful saleyard management system that simplifies livestock sales, vendor and purchaser record-keeping, NLIS compliance, weighbridge and scanner integration, and reporting. 1. Launching Stockyard To ...Scheduled Reports
Stages in Livestock Reporting Overview of Livestock Reports Generating and Previewing Reports Understanding Scheduled Reports (Bulk Email) 1. What are Scheduled Reports? Scheduled Reports are Stockyard’s way to send emails in bulk. When a sale is ...Clearing Sale Overview
The Stockyard Clearing Sale module allows agents to sell items other than livestock in a more basic format. It was created for use out of the office and in an environment where invoices could be printed, payments taken, money banked and sale ...Stockyard Beginners Guide - Creating a Sale
Creating and processing a sale in Stockyard is a step-by-step workflow that ensures all sale details — from vendor NVDs and lot creation to purchaser ways and RFID validation — are accurate and complete before reports or settlement are finalised. ...Management Report
Introduction The Management Report in Stockyard is designed to provide detailed insights into head counts, dollars per head (low, average, high), price per kilogram (c/kg) (low, average, high), weights (low, average, high) and lot totals from sales. ...