Adding Animals to a Feedlot
Adding a feedlot and assigning animals to the feedlot:
Step 1. Add the feedlot to contacts
When setting up Stockbook for a feedlot situation, a contact must be added.
- Click on the Contacts toolbar option
- Select Add
- Add the feedlot details. It is important to have the Surname filled in as this is what the contact will be displayed as.
- Click OK to save
Step 2. Add selected Animals to a Feedlot
- Select all the animals that you wish to move into the feedlot.
- Select Events
- Select Paddock/Custom Feedlot
- Click OK
- Enter the Date - Date of movement
- Select the Paddock e.g. ABC Feedlot from the dropdown menu or click the + button to add the paddock to Stockbook. If you are actually transferring the animals to a custom feedlot, but have not sold them, setup a paddock for each feedlot that you use.
- If you are adding the feedlot paddock here you will also need to add the property name and PIC for the feedlot.
- Reason 1 - select reason from the drop-down list or create a reason by clicking on the + button. e.g. Feedlot Entry
- Reason 2 - optional
- Comment - optional
- Tick the Custom Feedlot check box
- Enter the Estimated Entry Value c/kg e.g. 360
- Select Feedlot from the drop-down list
- Click OK to continue
- Click Yes to the following Confirm message
- Click OK to Information message: ' Event completed.'
- The animals have now been updated
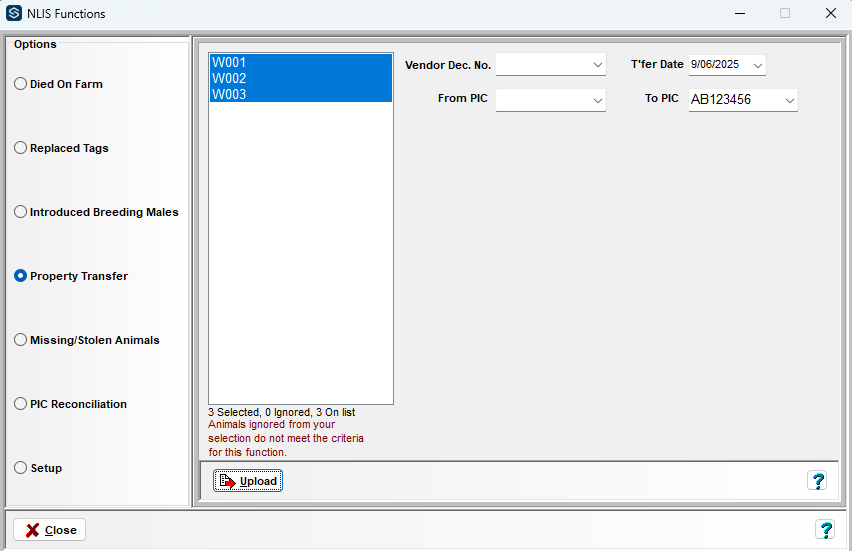
- Click Yes to the following Confirm message, which will take you to the NLIS Functions page.
Step 3. Fill in the transfer details
- Click on the Upload button to send these details to the NLIS Database
Click on the following link for instructions on NLIS Database and Stockbook: How do I setup and use the NLIS tab and what does it enable me to do?

Once data has been entered Pen Summaries and Feedlot Performance Reports can be utilised.
Article ID 863
Related Articles
Contacts
This article covers instructions for : Creating and assigning categories to a contact Filter contacts by category Export contacts to a .CSV file, for use in a mail-merge or spreadsheet Export Contacts to Excel Enter the date when contact was last ...Multi-Add Missing animals from EID Capturing
There are animals in the Fast EID Capture or Transfer from Data Screen that say the EID is missing. These animals have not yet been added into Stockbook, can these be added by using the Multi-Add Missing function? This can be done either through the ...Adding an EBV type
Adding an EBV type Adding an EBV type and import relevant data To add an index: Click on the Setup > Performance > Trait Analysis System menu option Scroll through the list of EBV's until you come to BObject Select one that does not have a tick in ...Add Animal Template in Live Entry
Add Animal Templates: these are used when the animal does not exist in Stock Book Data Entry Templates: these are used when animals have already been entered into Stock Book These instructions are for adding a new Add Animal template. There is a ...Add Data Entry Template in Live Entry
There are two main types of templates that might need to used. This article discusses the Data Entry Template. Data Entry Templates are used when animals have already been entered into Stock Book Add Animal Templates are used when adding new animals ...