Adding DNA Samples into Stockbook
There are a number of options for entering DNA samples into Stockbook.
- Using a barcode scanner,
- Manually typing samples into Live entry, or
- A master CSV import
Using a barcode scanner
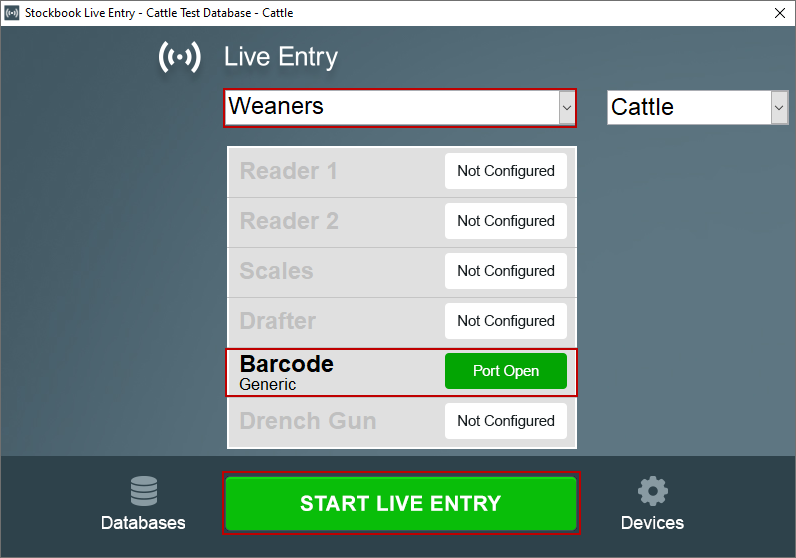
- Ensure the barcode scanner is connected to the computer
- Open Live Entry
- Choose a template you will be using on the day.
- Click Start Live Entry
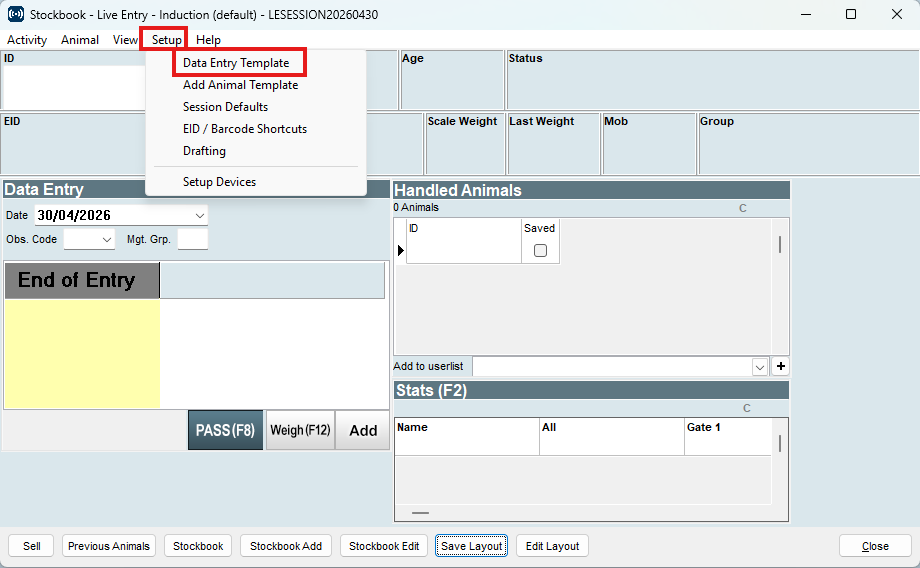
- Select Setup
- Select Data Entry Template
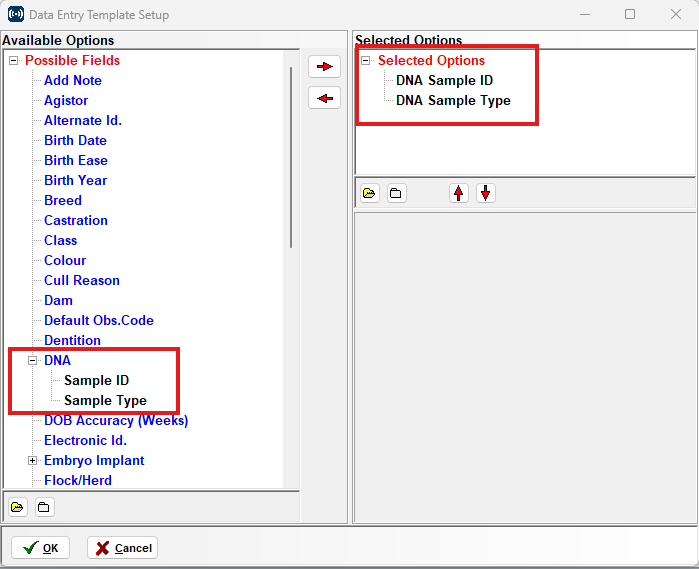
- Click the " + " to expand the DNA sub-options
- Use the arrows to move the sub fields (Sample ID and Sample Type) to Selected Options.
- Click OK
- The template will now show the fields you added.
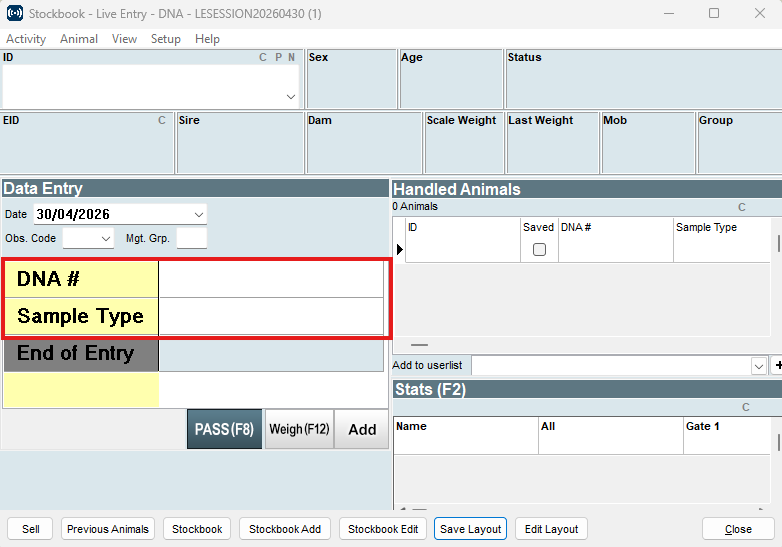
- If it is a new template, name the template and click OK
- If it is an existing template click Save Layout to save any changes made.
- Now bring the first animal through and Scan in the DNA # using the QR code on the end of the TSU or Hair Card
- Choose the Sample Type
Note: The Sample Type will be remembered by Live Entry once the first animal is saved
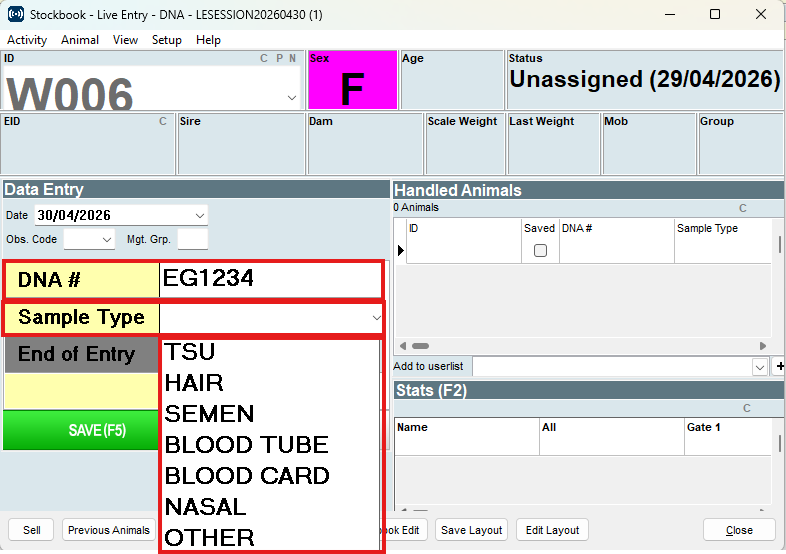
- Click Save (F5)
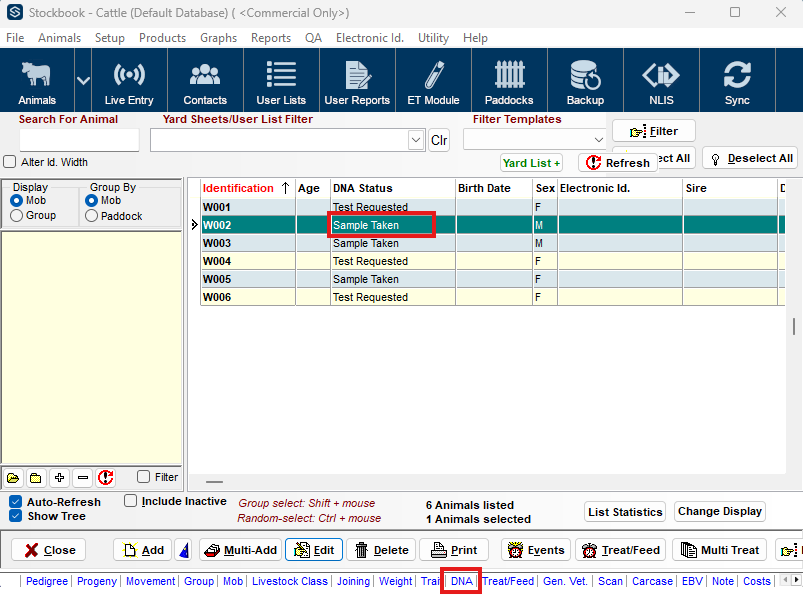
- The DNA status on the main animal screen will reflect as 'Sample Taken'
- The DNA sample will appear in the DNA table on the main animal screen, for each respective animal.
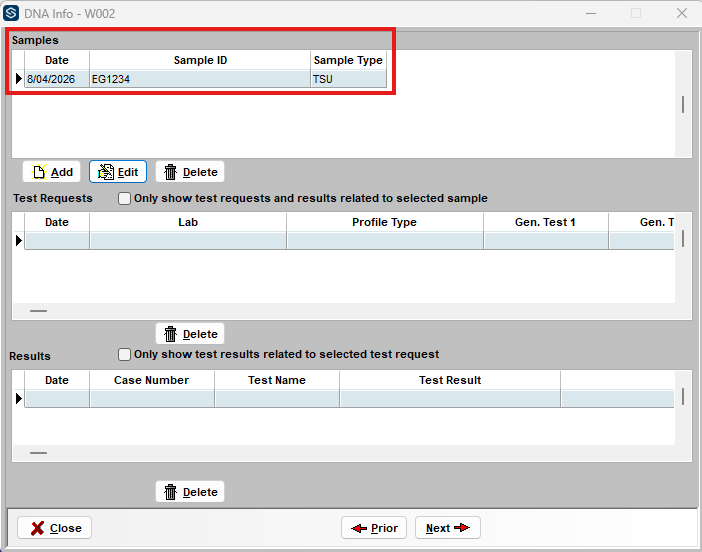
- A new window will appear and you should be able to observe the collected DNA data including
- Date of collection
- Sample ID
- Sample Type
- Choose a template you will be using on the day.
- Click Start Live Entry
- Select Setup
- Select Data Entry Template
- Click the " + " to expand the DNA sub-options
- Use the arrows to move the sub fields (Sample ID and Sample Type) to Selected Options.
- Click OK
- The template will now show the fields you added.
- If it is a new template, name the template and click OK
- If it is an existing template click Save Layout to save any changes made.
- Now bring the first animal through and Scan in the DNA # using the QR code on the end of the TSU or Hair Card
- Choose the Sample Type
Note: The Sample Type will be remembered by Live Entry once the first animal is saved
- Click Save (F5)
- The DNA status on the main animal screen will reflect as 'Sample Taken'
- The DNA sample will appear in the DNA table on the main animal screen, for each respective animal.
- A new window will appear and you should be able to observe the collected DNA data including
- Date of collection
- Sample ID
- Sample Type
Manually typing the samples into Live Entry
Follow the instructions outlined above.
In this instance the DNA sample details are manually typed in rather than using a Barcode scanner
Master CSV import of DNA samples
- Open the file with the animal DNA samples.
- The File at a minimum should have a link to the animals VID or EID
- Once you have confirmed the data is in the correct format, save the file as a CSV and close the file.
- Open Stockbook
- Go to File
- Select Import Options
- Select Details from Datafile
- In Step 1. Find the file to import using the browse function
- Move to Step 3.
- Choose a Default Obs Date. It is suggested making the Default Obs. Date the same as the date the samples were collected.
- In Step 4. line up the data as shown below
- Visual ID
- Data Type = Life Data
- Stockbook Field = ID
- Sample ID
- Data Type = DNA Samples
- Stockbook Field = Sample ID
- Sample Type
- Click OK
- Follow the prompts, if you get errors open the error file and investigate.
If the errors don't make sense, please call Outcross Systems Support Team.
- Close the import window
- Open the Animals screen
- Select the Last Import user list to view the most recent animals whose DNA sample data has just been imported.
- Select one of the animals
- Click on the DNA window link
- A new window will appear and you should be able to observe the collected DNA data including
- Date of collection
- Sample ID
- Sample Type
Related Articles
Adding DNA Samples into Stockbook
There are multiple ways of getting DNA samples into Stockbook. Using a barcode scanner via Live Entry Manually entered via Live Entry Master CSV import A. Using a Barcode Scanner to Collect the Samples into Live Entry. Connect the barcode scanner. ...Stockbook® DNA table
Stockbook® DNA tab Each animal in Stockbook® has a DNA tab associated with it. This tab is the central location for all DNA data linked to that animal. The DNA table includes samples, test requests and results. The DNA table location The DNA table is ...TSU template in Live Entry
TSU template in Live Entry Setting up a Live Entry template to collect a TSU sample. To bring in TSU (Tissue Sampling Unit) data into Live Entry follow these steps: Step 1. In Stockbook, Live Entry, go to Setup> Data Entry Template Step 2. Go to ...Add Animal Template in Live Entry
Add Animal Templates: these are used when the animal does not exist in Stock Book Data Entry Templates: these are used when animals have already been entered into Stock Book These instructions are for adding a new Add Animal template. There is a ...Full Stockbook Add in Live Entry
Full Stockbook Add in Live Entry Trying to Add new animal/s into Stockbook via Live Entry. Instead of going to the add animal template in Live Entry, it is taking me to the full Stockbook animal add. Step 1. Open Live Entry Start live entry to access ...